Card making, Cards & Tags, Darkroom Door, Darkroom Door Stamps

Abstract Play with Darkroom Door

Hello stampers!

I’m back sharing another couple of projects using one of the new Abstract Stamps designed by Darkroom Door. These stamps are the perfect size for a variety of projects from art journals to card making. I thought most people will see these and think mixed media projects or art journaling, so I thought I’d shake it up a bit and create a pair of cards and a tag.

I started my tag by spritzing spray ink over a large Manilla tag and once dry stamped the Darkroom Door Abstract 02 stamp right down the centre of the tag. This gives a striking start to the tag design. I inked the edges of the tag and added a line of faux stitching as a border.

The Darkroom Door Patchwork Butterfly Collage stamp was stamped onto white card using black Archival ink, coloured using Ecoline markers and fussy cut. I glued the butterfly onto the tag just by the centre so that the wings could be lifted a little.

The addition of the word ‘Fly’ from Darkroom Door Steampunk stamp set and some ribbon finished the tag.

Next I wanted to share how to create some backgrounds using stamps and a Gel Press. The one thing to remember when using a stamp on the Gel Press is to wash it quickly and thoroughly! You don’t want any paint to dry in the crevices of the stamp as the image will become unusable. This technique will work best when the stamp has heavy, thick lines rather than fine, delicate images so the Darkroom Door Abstract 02 stamp is a perfect to use.

It is a good idea to have a few pieces of cardfront size white card ready when starting this technique – the paint will dry on your Gel Press before you are ready otherwise.

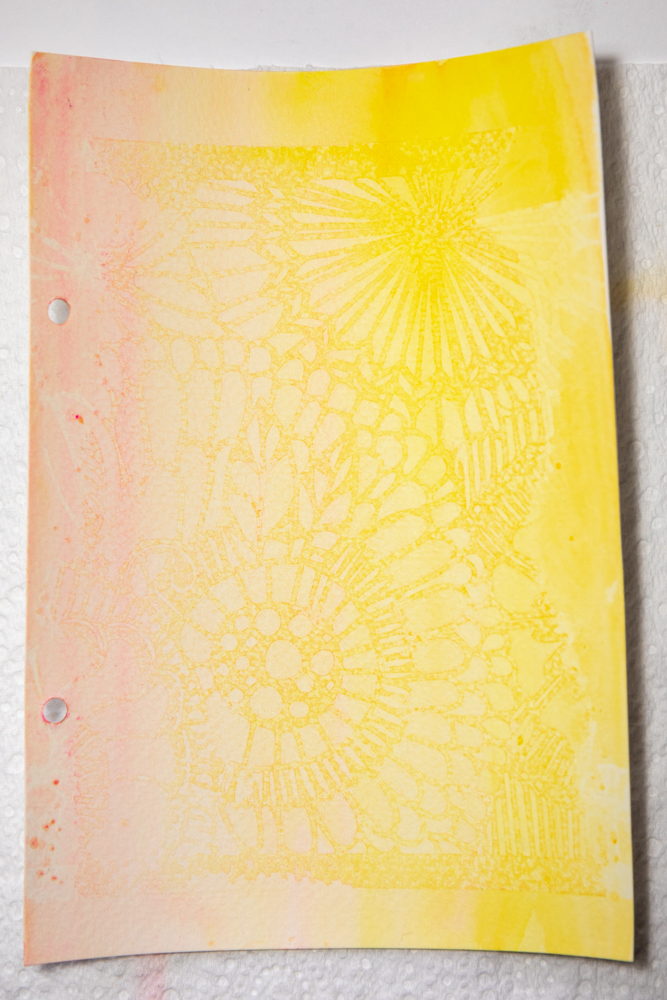
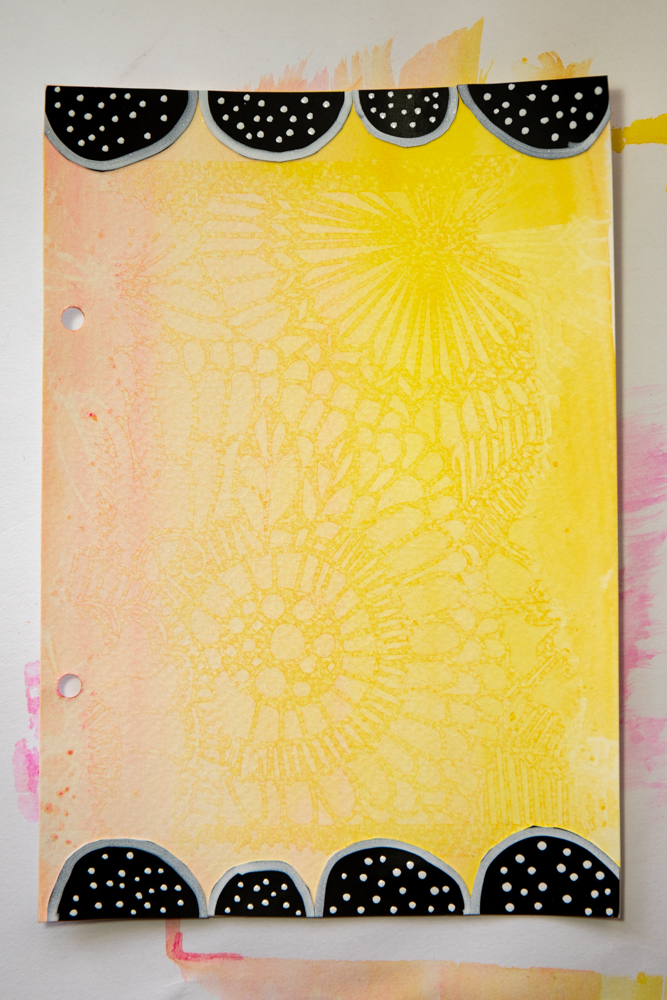
I started my background for this card by applying a small amount of paint to my Gel Press, spreading it out with a brayer. I used a mix of yellow and orange for my card for a subtle variation in colour. I then ‘stamped’ my Gel Press with the Darkroom Door Abstract 02 stamp to remove some of the paint from the plate. Before the paint dried on my stamp, I quickly ‘stamped’ onto a second piece of white cardstock that will be the basis for my next project. I then placed a piece of white cardstock over my Gel Press to pick up the pattern left behind. I love how this technique creates a tone on tone type of effect.

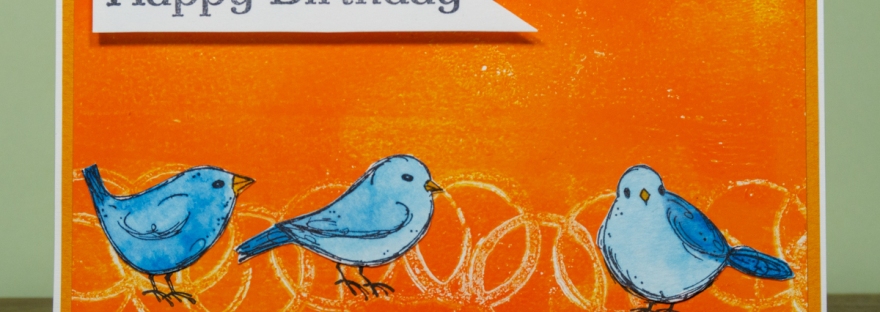
Once dry, the pieces are ready for use. I wanted to scatter a few tiny birdies from the Darkroom Door Garden Birds stamp set over the rings pattern, so I stamped them onto watercolour card using permanent black Archival ink. The birds were then coloured using Ecoline markers and fussy cut.

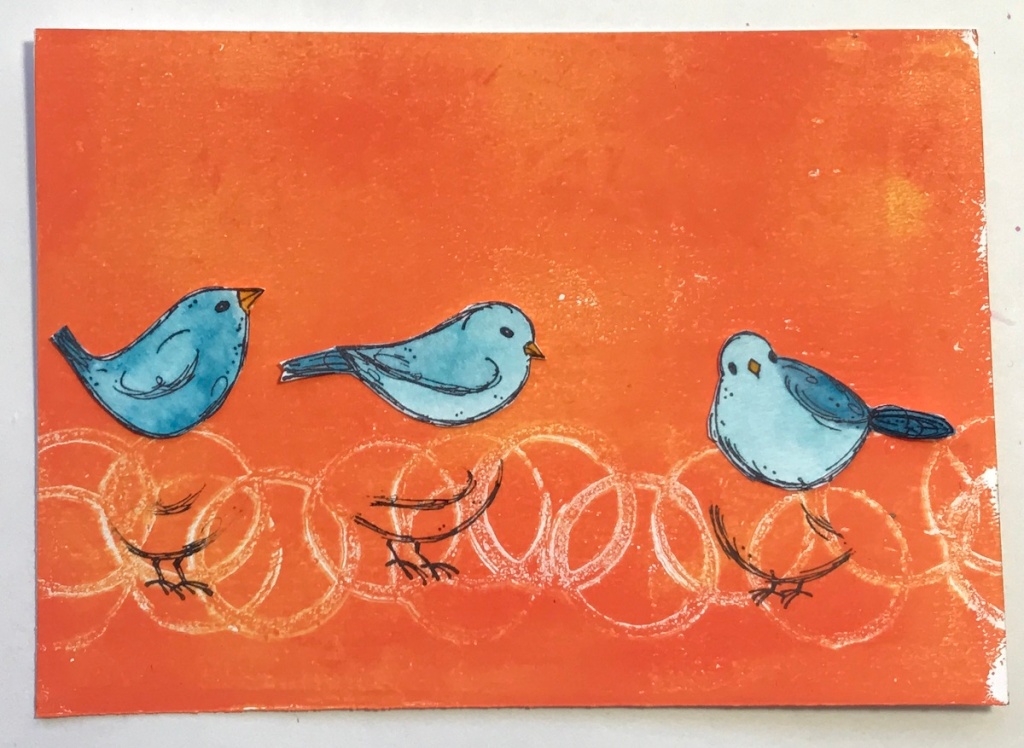
I find trimming around the legs of these tiny creatures a bit fiddly so I simply cut them off! The trick is to decide where the birds will go on the card and then stamp the ‘legs’ in place and layer the birdie ‘bodies’ over the top. It gives a seamless effect without a lot of effort – saves your eyes as well!

I layered up the card and added a greeting from the Darkroom Door Happy Birthday stamp set trimmed into a flag shape to finish it off.

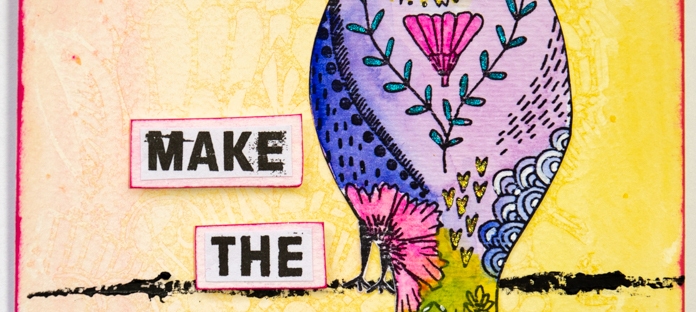
One thing I enjoy about using the Gel Press is the infinite number of prints I can make, I hate to waste paint so use up every scrap of it. This card is one example of that – once we ‘stamp’ the Gel Press for the card above the paint that transfers to the stamp is perfect for creating a second cardfront. I love how simple this looks but so effective!

I layered one of the larger birds from the Darkroom Door Garden Birds stamp set which had been stamped with permanent black Archival ink and coloured with Ecoline markers.

The leaves came from the Darkroom Door Carved Leaves Vol 1 stamp set. To give them a two-toned effect I inked them initially with Archival Vivid Chartreuse ink and then just around the edges I applied Archival Olive ink. Once they were fussy cut they gave a little bit of texture for the bird to sit on. A greeting from Darkroom Door Bold Blossoms stamp set and a bit of bling finished the card.

Supplies used:

  • Darkroom Door Abstract 02 stamp
  • Darkroom Door Happy Birthday stamp set
  • Darkroom Door Steampunk stamp set
  • Darkroom Door Garden Birds stamp set
  • Darkroom Door Carved Leaves Vol 1 stamp set
  • Darkroom Door Bold Blossoms stamp set 
  • Darkroom Door Patchwork Butterfly Collage stamp
  • Archival ink – Jet Black, Olive & Vivid Chartreuse
  • Gel Press plate, brayer & acrylic paint
  • Spray ink

Ecoline markers, black permanent penI hope you have enjoyed learning how these projects came together, make sure you pop over to the Darkroom Door blog to see what the rest of the contributing artists have come up with!

Card making, Cards & Tags, Darkroom Door, Darkroom Door Stamps, Distress Ink, Distress Oxide Ink

Mindful Stamping with Darkroom Door

Have you seen the fantastic new release of stamps from Darkroom Door? There is so much to love about this release (isn’t there always?) so I was keen to get busy when these newest ones arrived at my door. You can check them out here.

First up, I’ll be sharing some projects using the Darkroom Door Meditation rubber stamp set. This set has some lovely calming imagery and is perfect for some mindful stamping. I like to pop on some quiet music, set out a few colours of inks & plenty of paper to stamp on and just let my creative muse play.

All of these cards are created with either Distress Oxide or Distress inks to keep it nice & simple and I’ve kept the construction nice & easy. Ask me in the comments if you aren’t sure how the layers may have come together.

The larger of the two lotus images looks lovely stamped simply with Distress Oxide ink.

I’ve used Picked Raspberry and for a bit of shine, painted over the image with some Smooch Ink

Have you tried inking a stamp with more than one colour? Start with the lightest colour and then touch parts of the stamp with the darker colour and stamp your image. I love how this effect turns out!

Why not try combining Distress Oxide inks with Distress Inks in a similar colour?

For this next card, I stamped my image onto smooth watercolour card using two colours of Distress Oxide ink and heat set the ink. Then I carefully moved the colour around using a wet paint brush. The beauty of Distress Oxide inks mean that the pigment ink part stays in place while the dye ink part moves to give a lovely shading to the image.

A little spatter always looks good as well!

Now to change up my colour palette a little….

This card combines the step of stamping and colouring with Distress Oxide ink described above with extra layers of imagery. The first is stamped beneath the lotus flower and the second is laid over the top with wording stamped onto translucent vellum. I love the look this gives and it has so many uses!

Now it is time to quiet the mind and get a little tricky with inks. For this image I inked the stamp using Distress Ink in peacock feathers and spritzed it lightly before stamping. It resulted in a lovely soft watercolour effect. Once I had dried the image – I overstamped it with a fresh coat of Distress Ink to sharpen up the lines. A stamp press makes this step so easy!

For my final card, I stepped up the technique above a little using a basic gatefolded card base. Using a stamp press, I stamped the image using peacock feathers Distress Oxide Ink and then spritzed the stamped image a touch to get the ink to run and oxidise.

Once I had dried the image – I inked just the edges of the stamp using Archival Distress Ink in Hickory Smoke. This gave the outline some sharpness but didn’t overtake it like stamping in black would have.

I hope you have enjoyed learning how these cards came together. Make sure you tag me online if you create something similar – I’d love to see!

As always, a huge thanks to Rachel and Darkroom Door for feeding my love of their product through their gift of stamps.

Art by Marlene, Art Journal, The Crafters Workshop, Tutorials

Make the Impossible Possible

Are you a glass half full or half empty type of person? I’d like to think that I usually see them as half full – full of possibilities and endless opportunities. I’d like to share a new art journal page with you – this time it has been created in my mini Art by Marlene journal. I’ve also used Art by Marlene stamps and one of Marlene’s stencils from The Crafters Workshop. I love how all of Marlene’s products play so nicely together.

The format of this journal makes so many techniques possible – such as the one I’ve used for this page! The pages are easily removable and are made from a wonderful watercolour paper.

Follow along as I share how my page was created… the background technique gives a wonderful, subtle effect.

After choosing a stencil for the background pattern, I gave the page a layer of colour using watercolours. Keep the page quite wet with colour and quickly layer the totally clean stencil over before it dries. Allow the stencil and page to sit flat until fully dry.

Once removed, the stencil leaves a lovely, subtle pattern on the background.

You can get different effects by overlaying with plastic wrap or bubble wrap and changing up the colour palette to a darker, more saturated colour looks amazing.

I needed a little something to cover the areas at the top & bottom of the page where the stencil pattern didn’t quite reach – spotty circles fixed it nicely!

Marlene’s stamps often feature swirly patterns and doodles, they are so cute and I love using this bird stamp. Perfect for watercoloring so that is what I did;) Stamping the image onto watercolour yardstick with permanent black ink means the image was easily coloured without smudging.

In keeping with the colours on my page, I inked the edges a little with some permanent ink. Of course, a birdie needs a wire to sit on so a swish of black paint gave her somewhere to perch.

I felt the birdie needed a bit of sparkle – glitter gel pens to the rescue! What did we do before this glittery product?

I also added a bit of white detailing using a fine Posca pen to parts of the bird, including the whites of her eyes.

I love using quotes on my pages so selected one from Marlene’s sticker books and matted each of the words with a bit of cardstock I’d coloured with watercolour. Once trimmed, each word was also inked around the edges. Some foam squares gave them a little dimension and the page was done.

Supplies:

  • Art by Marlene A5 journal
  • Art by Marlene bird stamp
  • Art by Marlene sticker book
  • The Crafters Workshop Botanical Dream stencil
  • Black paint, watercolours, glitter gel pens, white Posca pen, permanent black ink

Thanks for visiting! I hope you have enjoyed learning how my page came together.

I thought it about time I made some more videos for YouTube. You will find one for this project on my channel shortly.